With Microsoft 365 Backup you add an extra layer of protection to Microsoft 365. We then create a complete backup of your OneDrive, your SharePoint, emails, contacts … Something Microsoft 365 does not offer by default.
Document (accidentally) deleted? That’s never a problem again. Activate Microsoft 365 Backup and you restore any file in just a few clicks.
Activate Microsoft 365 Backup for your users
Activate Microsoft 365 Backup through our control panel
- Go to “My products” > “Microsoft 365” (and choose your tenant if you have several).
- Select “Users” from the menu on the left.
- Select the user you need and click on the three dots on the right
- Then select “Manage user”
- Click on “Order backup”
- Select all users you want backup for and click “Go to store” to complete your order.
- After completing your order, we will activate your backup(s) for the selected user(s). This can take up to one hour.
Consult and restore backups
Follow these steps in the control panel to consult your backups
- Go to “My products” > “Microsoft 365” (and choose your tenant if you have several).
- Select “Backups” from the menu on the left.
- At the top, you will find the link to the Restore Portal for your Microsoft 365 tenant. All your users can log in via that link with their Outlook / Microsoft 365 login details.
- In the Restore Portal, you can view all backups and view and restore documents.
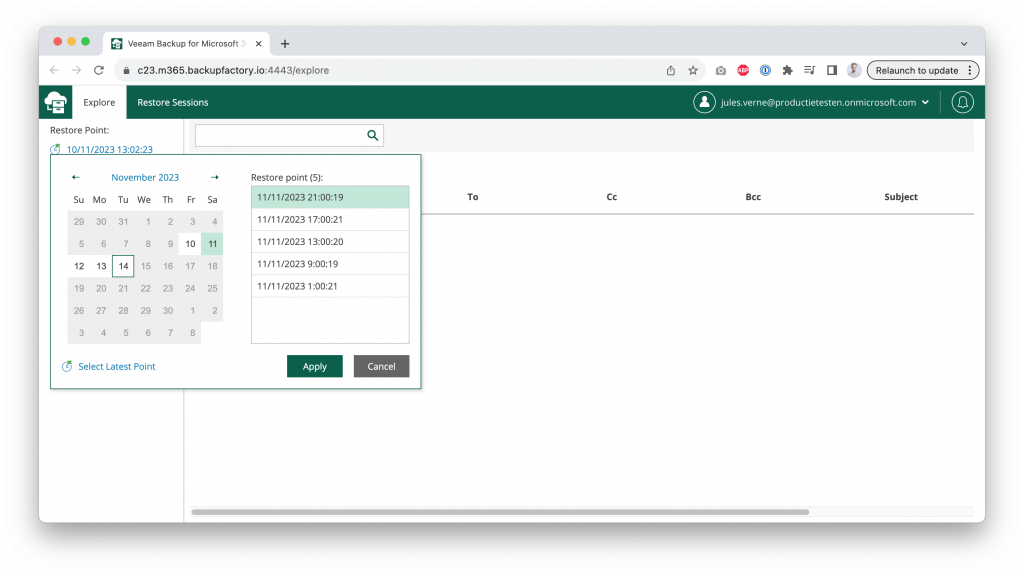
- At the top left of the Restore Portal, click on the date and time to select the correct backup (see screenshot). A backup is made every 4 hours.
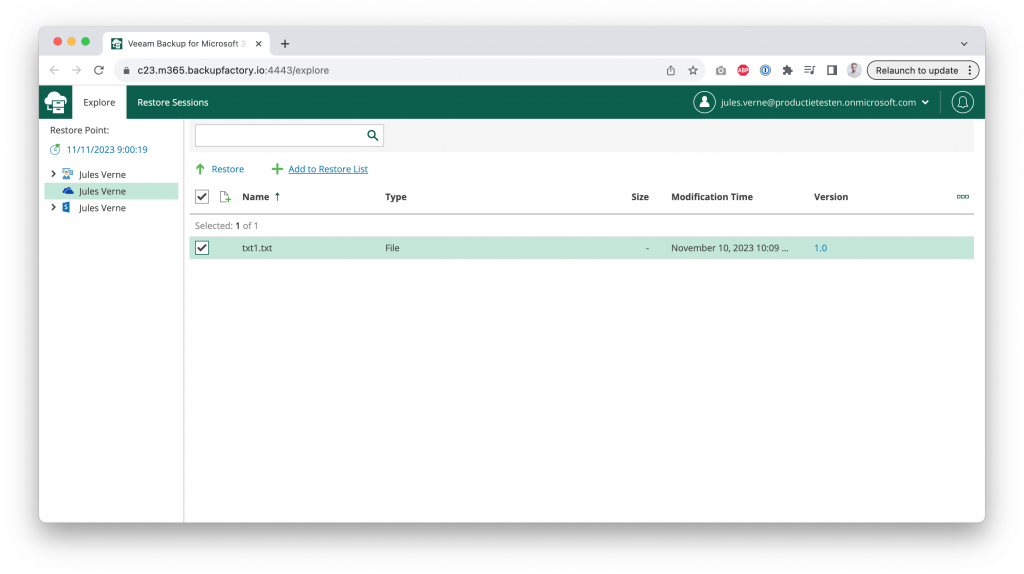
- In the folders on the left, you can look up documents in your mailbox, OneDrive and SharePoint websites. Select the desired files and click “Restore” at the top to restore them immediately (see screenshot).
Or click “Add to restore list” to add them to a list of files you want to restore. You can then access the Restore List at the top via “Restore list” in the navigation. From there, you can restore files or remove them from the list.
Manage backups of multiple users
Sometimes it is convenient to have access to your users’ backups. You can do this by checking the “Manage other users” option for a user. That user then has access to all your users’ backups. Useful for e.g. system administrators.
Follow these steps in the control panel to give a user access to all backups
- Go to “My products” > “Microsoft 365” (and choose your tenant if you have several).
- Select “Users” from the menu on the left.
- Select the user you need and click on the three dots on the right
- Then select “Manage user”
- At the bottom, tick “Manage other users” under Backups.