Drupal is one of the most popular content management systems. It can handle small and large websites equally well, with a little optimization. This article will help you prepare your CMS to handle large traffic without losing on speed.
The first part of this article will show you standard optimization techniques, suitable for every hosting, even if you are not using the caching options.
Only when you have completed the general optimization, you can proceed to the second part of the article, which shows you how your CMS can benefit from the Performance hosting tools.
IN THIS ARTICLE:
- Use the Drupal cache
- Activate APC
- Use the Boost module
- Client optimization
- Install Aggregate Cache
- Manage Render blocking resources
Use the Drupal cache
Enabled by default for Drupal 8
Activate it in the backend of Drupal like so:
- Log in with your Drupal admin area
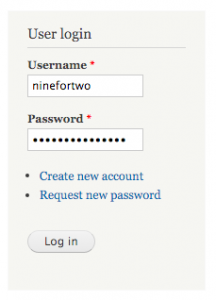
- Click on Configuration at the top of the admin bar

- Click on Performance in the Development section

- Here check the following:
- Cache pages for anonymous users
- Cache blocks
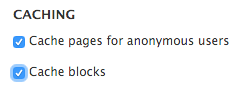
- Click on Save configuration

Activate APC
WARNING: Do not activate APC if you are going to use the optional caching Redis add-on!
(Do not do the changes for APC in settings.php – do it in the backend).
- Activate APC in the control panel. APC is available for PHP 5.4 and lower
- Log in the control panel
- Follow My Products >> Web hosting >> Hosting details
- From the left-hand panel go to PHP settings

- You are now in the Overview. Check the PHP version.
- Switch to the ON/Off tab.
- Switch on apc.
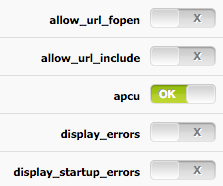
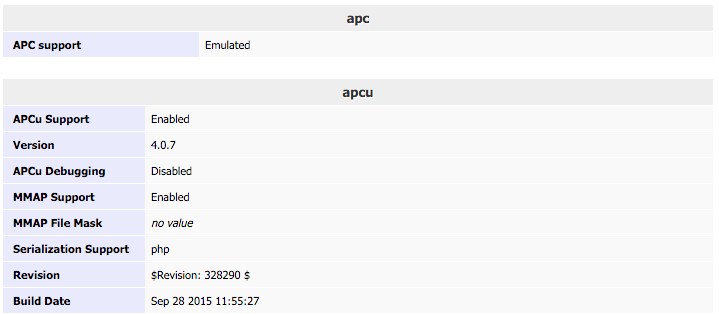
- PHP changes take time. To check if your changes took place switch to the PHP info tab. Look for the APC section. If it is there, you have activated APC successfully.
- Click on the link to download Drupal APC and install in /sites/all/modules/.


- Enable APC from the Modules section of your backend.


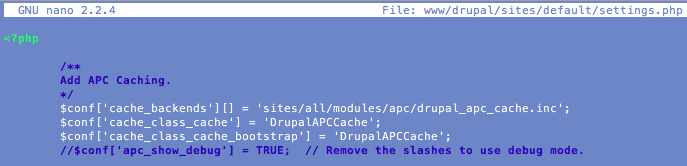
- Now add the following code to the settings.php file.
This file can be found in /sites/default/settings.php (from the root of your Drupal installation).
 /**
Add APC Caching.
 */
 $conf['cache_backends'][] = 'sites/all/modules/apc/drupal_apc_cache.inc';
 $conf['cache_class_cache'] = 'DrupalAPCCache';
 $conf['cache_class_cache_bootstrap'] = 'DrupalAPCCache';
 //$conf['apc_show_debug'] = TRUE;  // Remove the slashes to use debug mode.
![]()
![]()
Now check if the site still works. If yes, proceed to the next step.
Add the following code to the settings.php file:
 $conf['page_cache_without_database'] = TRUE;
 $conf['page_cache_invoke_hooks'] = FALSE;
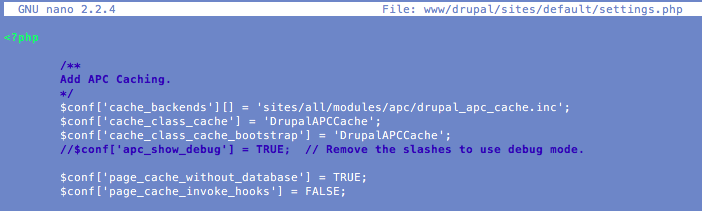
This ensures that page caching also calls for APC.
Double check if the site still works.
Use the Boost module
- Prepare
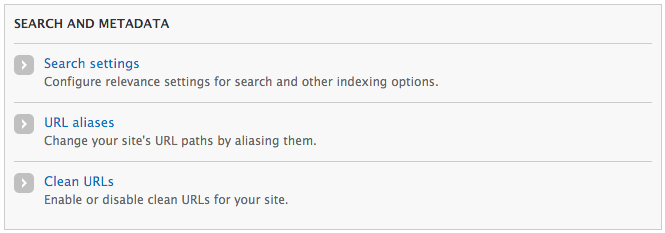
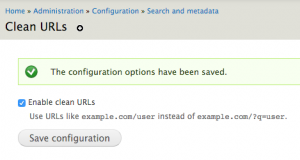
- Enable Clean URLs in Configuration >> SEARCH AND METADATA >> Clean URLs

- Make sure Cronjobs are not disabled.
- Enable Clean URLs in Configuration >> SEARCH AND METADATA >> Clean URLs
- Download the Drupal Boost module and install it in your Drupal folder, in sites/all/modules.


- Enable the module from the Modules section of your backend.


- Follow Configuration >> Development >> Performance and uncheck Cache pages for anonymous users.


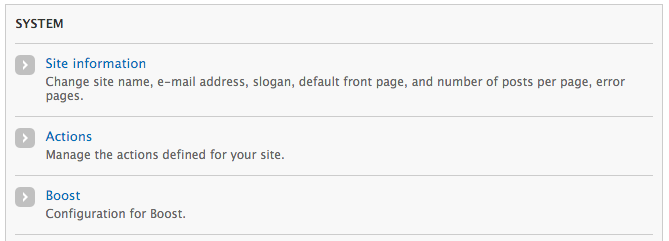
- Make sure the cache directory in Configuration > System > Boost > File System has 755 permissions.


- .htaccess
- Backup your original .htaccess file.

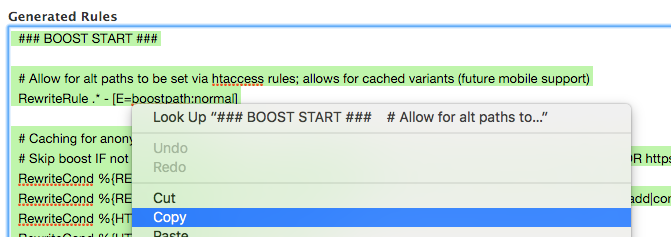
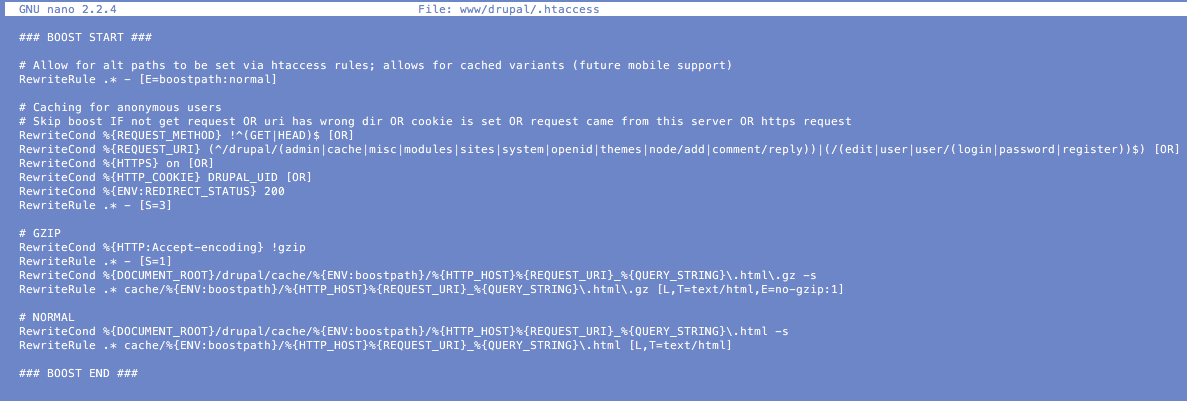
- Copy the custom generated .htaccess rule from Configuration > System > Boost > .htaccess > .htaccess Generation and copy them into your .htaccess file. – make sure you paste the segment in the correct place – see the instructions bellow the generated text.


- Check if the website still works. If not, restore your .htaccess file and try again.
- Backup your original .htaccess file.
- Congrats, your Drupal is boosted. If you feel like you need to troubleshoot the Boost module installation, click on the link.
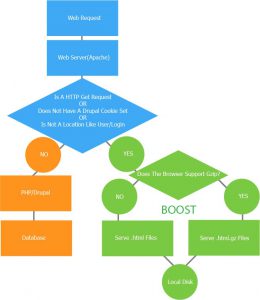
This shows a flow Drupal Boost will add:
Client optimization
The client can proactively work with multiple subdomains to load media faster. When a client downloads data too slow, it does not hurt to see with the Firefox plugin Firebug what exactly is to be loaded. If there are, for example, more than 50 separate items are to be loaded, it may be appropriate to point out the following:
Simultaneous Browser Connections
- IE7: 2 simultaneous connections
- IE8: 6 simultaneous connections
- Google Chrome: 6 simultaneous connections
- Mozilla Firefox: 8 simultaneous connections
This means that when there are 50 items to be loaded, it will slow down the loading time, considering all the actions put on hold until a connection is made available. Only then will the next element of your site be loaded and so on until all items are loaded. Of course the speed depends on the size, too.
Ways to speed it up:
- Using CSS sprites
- Load of elements through individual (sub) domains
CSS sprites:
A CSS sprite can counteract this because then there is only one image file to be loaded, resulting in fewer connections are required and often the total size can be reduced.
Click on the link for more information on CSS sprites
Use of (sub) domains in order to load into elements:
A second way to increase the loading time in your code is, for example, by using multiple sub-domains. Your browser limits the number of concurrent connections per domain, but the browser will see domainname.be, css.domainname.be, images.domainname.be and consider all these as a separate domain, which gives you a higher number of simultaneous connections.
For example, by having the images be downloaded using images.domeinnaam.be and css files via css.domeinnaam.be, you can speed up the loading time because – files will run simultaneously with the connections bypassing your browser’s limitations. With this method you can actually realize three times as many simultaneous connections.
Install Aggregate Cache
- Prepare
- CLEAN URLs must be enabled.
- Enable in Search & Metadata >> Clean URLs
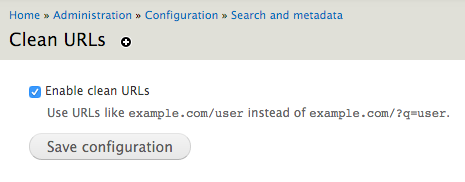
- Enable in Search & Metadata >> Clean URLs
- CSS / Javascript Aggregation must be enabled.
- CSS / Javascript Aggregation is in the Configuration >> Development, under Performance. Make sure you tick the following:
- Aggregate and compress CSS files.
- Aggregate JavaScript files.


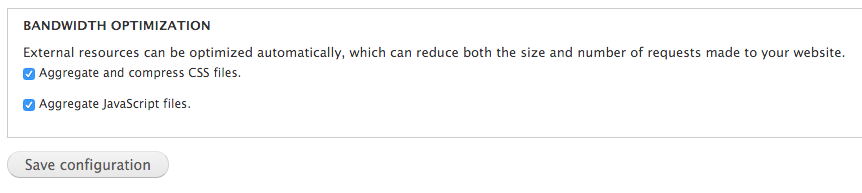
- CSS / Javascript Aggregation is in the Configuration >> Development, under Performance. Make sure you tick the following:
- CLEAN URLs must be enabled.
- Download and install
- Download Aggregate Cache by clicking on the link.

- Install in /sites/all/modules


- Enable the module from the Modules section of your backend.


- Download Aggregate Cache by clicking on the link.
Manage Render blocking resources.
Do the adjustments below to make the browser start rendering faster, and the load time to decrease significantly.
Move Javascript location
Place Javascript in the footer of the website so that it will be loaded later in the process (after the page is largely rendered)

CSS inline
Inline only the most critical CSS code in the theme files and leave the rest load asynchronously via LoadCSS (refer to this https://github.com/filamentgroup/loadCSS)

Using async/defer
The module allows for critical JavaScript code to be put inline.
- Download the “Magic” module by clicking on the link.

- Install in /sites/all/modules


- Enable the module from the Modules section of your backend.


A couple more tweaking options are:
- Concatenation of files (such as CSS files)
- Put essentials (of js, css and others) inline the PHP files.
- CSS Spriting
477